Lash mapping is a crucial design strategy‚ acting as a blueprint for lash extensions‚ ensuring enhancement of natural features.
It involves planning lash placement—lengths‚ curls‚ and thicknesses—along the lash line for customized‚ beautiful results.
What is Lash Mapping?
Lash mapping‚ at its essence‚ is a meticulously planned design strategy – essentially‚ a blueprint for a stunning set of lash extensions. A skilled stylist utilizes a lash mapping chart or guide to strategically determine the precise placement of varying lash lengths‚ curls‚ and thicknesses along the entire lash line;
This isn’t simply about applying extensions; it’s about crafting a look that harmonizes with and elevates a client’s unique eye shape and natural beauty. The goal is to enhance‚ not overwhelm‚ the features. A well-executed lash map considers the client’s desired style‚ from subtle and natural to bold and dramatic‚ ensuring the final result is perfectly tailored to their preferences and facial structure. It’s the foundation of a flawless‚ customized lash experience.
Why is Lash Mapping Important?
Lash mapping is paramount for achieving consistently beautiful and customized lash extension results. Without a detailed map‚ the final look can appear uneven‚ unnatural‚ or simply not complement the client’s eye shape. It allows lash artists to move beyond a ‘one-size-fits-all’ approach‚ tailoring each set to the individual.
Effective mapping ensures balanced weight distribution‚ preventing discomfort and potential damage to natural lashes. It’s key to creating specific effects – like a lifted cat eye or an open doll eye – and fulfilling client requests accurately. Furthermore‚ a thoughtful map demonstrates professionalism and attention to detail‚ building trust and client loyalty. Ultimately‚ lash mapping transforms a simple extension application into a personalized beauty experience.

Understanding Eye Shapes for Mapping
Lash mapping success hinges on recognizing individual eye shapes—round‚ almond‚ hooded‚ upturned‚ downturned‚ close-set‚ and wide-set—to create harmonious looks.
Round Eyes Lash Mapping
Round eyes‚ characterized by a visible iris and balanced proportions‚ benefit from lash mapping that creates the illusion of length and depth. To achieve this‚ focus on strategically applying longer lashes towards the outer corner of the eye‚ gently elongating the overall shape.
A thoughtful combination of medium and long lash lengths is ideal‚ with the longest lashes concentrated in the outer third of the lash line; It’s crucial to avoid excessive volume on the inner corners‚ as this can make the eyes appear even rounder and potentially lose definition.
Opting for C or D curls will further enhance the lifting and lengthening effect. These curls provide a natural lift without appearing overly dramatic. Remember‚ the goal is to subtly enhance the eye’s natural beauty‚ not to drastically alter its shape.
Almond Eyes Lash Mapping
Almond eyes‚ naturally balanced and slightly upturned‚ are incredibly versatile and can handle a wide range of lash mapping styles. However‚ the key is to enhance their natural elegance rather than drastically altering their shape. A classic approach involves a gradual increase in lash length from the inner to outer corner.
This creates a subtle lift and emphasizes the eye’s natural almond shape. Utilizing a mix of medium and long lashes works beautifully‚ with the longest lashes placed strategically in the outer third. C or D curls are excellent choices‚ providing a natural lift and curl.
For a more dramatic effect‚ consider a slight cat-eye map‚ but ensure it remains subtle to complement the eye’s natural form. Avoid overly heavy volume on the inner corners to maintain the eye’s balanced appearance.
Hooded Eyes Lash Mapping
Hooded eyes‚ characterized by a fold of skin covering part of the eyelid‚ require a strategic lash map to open up the eye area and create the illusion of greater space. The goal is to lift the hooded portion and make the eyes appear more visible. A key technique is to focus on longer lashes in the center of the eye.
This draws attention upwards and creates a lifting effect. Gradually decrease the lash length towards the inner and outer corners. Utilizing a D curl is highly recommended‚ as it provides maximum lift and helps to counteract the downward slope of the hood.
Avoid applying overly long lashes directly onto the hooded area‚ as they can get hidden and diminish the impact. Careful mapping and strategic placement are essential for achieving a flattering and noticeable result.
Upturned Eyes Lash Mapping
Upturned eyes‚ naturally lifted at the outer corners‚ possess a youthful and vibrant appearance. Lash mapping for this eye shape aims to enhance this natural lift and create a more open‚ doll-like effect. A balanced approach is key‚ avoiding overly dramatic styles that can appear exaggerated.
Begin by mapping slightly longer lashes towards the outer third of the eye‚ subtly accentuating the natural upward tilt. A C or D curl works beautifully‚ maintaining the lift without appearing too extreme. Focus on building volume gradually from the center outwards‚ creating a soft‚ feathered look.
Avoid heavy volume on the inner corners‚ as this can close off the eye. The goal is to enhance the existing shape‚ not drastically alter it‚ resulting in a naturally beautiful and captivating gaze.
Downturned Eyes Lash Mapping
Downturned eyes‚ with a slight droop at the outer corners‚ benefit from lash mapping that creates the illusion of a lift and brightens the overall appearance. The objective is to counteract the downward angle and open up the eyes‚ making them appear more awake and youthful.
Focus on mapping longer lashes towards the outer corners‚ gradually increasing the length to create a visible lift. A D curl is highly recommended‚ providing maximum lift and curl. Incorporate volume strategically‚ building density towards the outer third of the lash line.
Avoid applying the longest lashes directly to the outermost point‚ as this can accentuate the downturn. Instead‚ focus on creating a gradual lift‚ ensuring a balanced and flattering result. A touch of curl variation can also add dimension.
Close-Set Eyes Lash Mapping
Close-set eyes‚ where the inner corners are closer together‚ require a lash mapping strategy designed to create the illusion of wider-set eyes and balance the facial features. The goal is to draw attention outwards‚ making the eyes appear more spacious and open.
Begin by applying shorter lashes to the inner corners‚ gradually increasing the length as you move towards the outer corners. This creates a subtle widening effect. A C or D curl works well‚ providing lift and definition. Focus on building volume towards the outer third of the lash line.
Avoid heavy volume or overly long lashes on the inner corners‚ as this can accentuate the closeness of the eyes. Strategic placement and length variation are key to achieving a balanced and harmonious look.
Wide-Set Eyes Lash Mapping
Wide-set eyes‚ characterized by a larger distance between the inner corners‚ benefit from lash mapping that creates the illusion of bringing the eyes closer together and adding balance to the face. The aim is to minimize the space between the eyes and create a more proportionate appearance.
Start by applying longer lashes to the inner corners‚ gradually decreasing the length as you move towards the outer corners. This draws the eye inwards. A C or D curl can provide a beautiful lift‚ but avoid overly dramatic curls that might exaggerate the width.
Concentrate volume on the inner two-thirds of the lash line‚ creating a fuller‚ more defined look towards the nose. This helps to visually narrow the eye spacing. Avoid overly sparse lashes on the outer corners.

Popular Lash Mapping Techniques
Lash artists utilize diverse mapping techniques—Classic‚ Cat Eye‚ Doll Eye‚ Hybrid‚ and Volume—to achieve customized looks‚ enhancing client’s natural beauty and preferences.
Classic Lash Mapping
Classic lash mapping focuses on applying single lash extensions to each natural lash‚ creating a natural and enhanced look. This technique prioritizes mimicking the natural lash line‚ adding length and subtle volume. A typical classic map involves using consistent lengths across the eye‚ often with a slight increase towards the outer corner for a gentle lift.
When mapping for a classic set‚ consider the client’s natural lash health and density. Avoid overly long extensions on fine or weak lashes to prevent damage. Mapping guides often suggest starting with shorter lengths in the inner corner and gradually increasing towards the outer third. C curl is a popular choice for classic sets‚ providing a natural lift without being overly dramatic. The goal is a seamless blend that looks effortlessly beautiful.
Cat Eye Lash Mapping
Cat eye lash mapping is designed to create a lifted‚ elongated eye shape‚ mimicking the sleek look of a feline eye. This technique involves strategically placing longer lash extensions towards the outer corners of the eyes‚ gradually decreasing in length as you move inwards. A pronounced lift is achieved by utilizing a more curled lash‚ such as a C or D curl‚ particularly on the outer sections.
Successful cat eye mapping requires careful consideration of the client’s eye shape and desired level of drama. For a subtle cat eye‚ focus on a gradual length increase; for a bolder effect‚ a more dramatic length progression is key. Layering techniques and mixing curls can add dimension. Remember to maintain balance and avoid overly heavy volume on the inner corners to truly emphasize the lifted effect.
Doll Eye Lash Mapping
Doll eye lash mapping aims to create a wide-eyed‚ youthful‚ and open look‚ reminiscent of a doll’s features. This technique centers around placing the longest lash extensions in the middle of the lash line‚ creating a focal point that brightens and enhances the eyes. The length gradually decreases towards both the inner and outer corners‚ maintaining a balanced and symmetrical appearance.
Achieving a perfect doll eye effect requires precision and symmetry. A strong curl is essential‚ particularly towards the outer edges‚ to lift and open the eyes further. This style is ideal for clients seeking a subtle yet noticeable enhancement‚ avoiding overly dramatic looks. It’s an art of perfect symmetry‚ focusing on balanced lash placement for a captivating‚ youthful gaze.

Hybrid Lash Mapping
Hybrid lash mapping expertly blends the subtlety of classic lash extensions with the volume and texture of volume lashes‚ offering a customizable and versatile look. This technique allows lash artists to create dimension and fullness while maintaining a natural appearance. Typically‚ a hybrid set incorporates both individual classic lashes and lightweight volume fans strategically placed throughout the lash line.
Currently‚ hybrid sets are incredibly popular‚ with artists experimenting with custom mapping for unique results. The ratio of classic to volume lashes can be adjusted to suit each client’s preferences and eye shape. This approach provides a soft‚ feathery effect‚ enhancing the natural lashes without appearing overly dramatic‚ making it a highly sought-after choice.
Volume Lash Mapping
Volume lash mapping focuses on creating a fuller‚ more dramatic lash look by applying multiple lightweight extensions to each natural lash. Unlike classic lash extensions‚ which use a 1:1 ratio‚ volume mapping utilizes fans of 2-6 (or more) extensions per natural lash‚ carefully distributed to avoid damage and maintain a healthy lash line.
Successful volume mapping requires a thorough understanding of lash weight and balance. Strategically placing lighter-weight fans towards the inner corners and gradually increasing the volume towards the outer corners creates a balanced and flattering effect. Artists often employ layering techniques and varied fan arrangements to achieve desired textures and densities‚ resulting in a luxurious and captivating lash set.

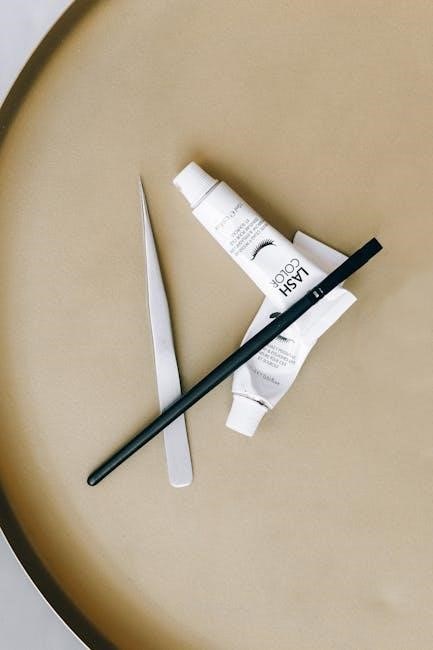
Lash Mapping Tools & Materials
Essential tools include lash mapping pads‚ pencils‚ and calipers for precise measurements. These materials aid in designing and executing customized lash extension plans effectively.
Lash Mapping Pads & Guides
Lash mapping pads and guides are foundational tools for any lash technician. These typically come in the form of adhesive mats or paper templates representing a client’s eye shape. Mapping pads provide a clean surface to sketch out the desired lash design before application‚ preventing direct marking on the client’s skin.
Guides often feature pre-drawn eye shapes and designated areas for different lash lengths and curls‚ streamlining the mapping process‚ especially for beginners. They help visualize the final look and ensure symmetry. Some pads are reusable‚ while others are disposable for hygienic purposes. Utilizing these tools allows for precise planning‚ resulting in balanced and aesthetically pleasing lash extensions tailored to each individual’s eye contours and preferences.
Lash Mapping Pencils & Markers
Lash mapping pencils and markers are essential for translating your design onto the mapping pad or directly onto the client’s skin (with appropriate sanitation and client consent‚ of course!). These tools allow for precise outlining of lash lengths and placement.
Pencils‚ often in shades of white or light blue‚ are ideal for subtle markings that are easy to erase or cover with lash adhesive. Markers‚ specifically designed for skin‚ offer bolder lines for clearer visualization. It’s crucial to use products formulated for cosmetic use to avoid irritation. A fine-tipped applicator ensures accuracy‚ enabling detailed mapping for techniques like cat-eye or doll-eye styles. Proper tools contribute to a professional and efficient lash application process.
Calipers for Lash Measurement
Calipers are indispensable tools for precise lash measurement‚ ensuring symmetry and balance in your mapping. They allow you to accurately determine the client’s natural lash length and eye width‚ crucial for selecting appropriate extension lengths and creating a harmonious look.
Using calipers helps avoid guesswork and ensures consistent results across both eyes. Measuring from the base of the natural lash to the desired extension length guarantees a comfortable and aesthetically pleasing application. Digital calipers offer even greater precision‚ displaying measurements on a clear screen. Accurate measurements are fundamental to successful lash mapping and client satisfaction‚ preventing issues like poking or discomfort.

Advanced Lash Mapping Concepts
Advanced mapping involves custom designs‚ layering lashes for dimension‚ and utilizing varied curls (C‚ D‚ L) and lengths for unique‚ personalized results.
Custom Lash Mapping
Custom lash mapping transcends pre-defined styles‚ embracing individuality and a client-focused approach. It’s about meticulously analyzing each client’s eye shape‚ natural lash pattern‚ and desired outcome to create a truly bespoke design. This involves deviating from standard maps – like cat-eye or doll-eye – and strategically placing lashes to correct asymmetry‚ enhance specific features‚ or achieve a completely unique aesthetic.
A skilled artist will consider factors beyond eye shape‚ such as the client’s lifestyle and makeup preferences. For example‚ someone who frequently wears winged eyeliner might benefit from a map that complements that style. Custom mapping often incorporates layering techniques‚ combining different curls and lengths within a single set to add depth and texture. It’s a more complex process‚ demanding a strong understanding of lash anatomy and design principles‚ but the results are undeniably stunning and tailored to the individual.
Layering Techniques in Lash Mapping
Layering techniques elevate lash mapping beyond simple length and curl choices‚ adding dimension and a more natural‚ textured appearance. This involves strategically applying multiple lash lengths and curls within a single fan‚ or across different sections of the lash line. For instance‚ combining a C curl at the base with a D curl at the tip creates a subtle lift and volume boost.
Artists often utilize layering to correct natural lash inconsistencies or to build customized effects. A common approach is to layer shorter lashes underneath longer ones for a fuller look‚ or to alternate curls to create a wispy‚ undone style. Hybrid lash mapping heavily relies on layering‚ blending classic and volume lashes for a balanced result. Mastering these techniques requires precision and an understanding of how different lash combinations interact to achieve the desired aesthetic.
Curl Variations in Lash Mapping (C‚ D‚ L)
Curl selection is fundamental in lash mapping‚ dramatically influencing the overall eye appearance. C curls offer a natural lift‚ ideal for clients seeking subtle enhancement or those with already lifted natural lashes. D curls provide a more dramatic‚ noticeable curl‚ perfect for downturned eyes or creating a wide-eyed effect. Increasingly popular‚ L curls are designed for hooded eyes‚ offering lift without initial contact with the eyelid.

Understanding these variations allows for customized looks. Combining curls—using a D curl on the outer corner and a C curl inward—can create a sophisticated cat-eye effect. L curls prevent poking and maximize comfort for hooded eye shapes. Proper curl selection‚ based on eye shape and client preference‚ is key to a successful and comfortable lash application.
Length Variations in Lash Mapping
Length variations are central to effective lash mapping‚ creating customized looks that complement individual eye shapes and preferences. Generally‚ shorter lengths (8-10mm) are used for the inner corner‚ gradually increasing towards the center (11-13mm)‚ and reaching the longest lengths (14-17mm) at the outer corner for a natural‚ balanced effect.
However‚ this is a guideline‚ not a rule! For round eyes‚ emphasizing length at the outer corner elongates the shape. Doll eye mapping utilizes the longest lengths in the center for an open‚ youthful appearance. Careful consideration of the client’s natural lash length and desired outcome is crucial. Mastering length variations allows for truly bespoke lash sets‚ enhancing beauty and confidence.
Thickness & Diameter Considerations
Lash thickness and diameter significantly impact the final look and‚ crucially‚ the health of the natural lashes. Diameter‚ measured in millimeters (0.15mm‚ 0.18mm‚ 0.20mm‚ etc.)‚ determines the lash’s weight. Thinner diameters (0;15mm & 0.18mm) are ideal for delicate natural lashes or creating a softer‚ more natural look‚ while thicker diameters (0.20mm & 0.25mm) offer more dramatic volume.
Thickness refers to the number of lashes bundled together. Selecting the appropriate diameter is vital to prevent damage. Always assess the client’s natural lash strength. Heavier lashes can cause premature shedding. A skilled lash artist balances desired volume with lash health‚ ensuring a beautiful and sustainable result.
Troubleshooting Lash Mapping Issues
Lash mapping corrections often involve addressing uneven sets‚ fixing mistakes through careful removal and reapplication‚ and prioritizing client preferences during consultations.
Addressing Uneven Lash Sets
Uneven lash sets are a common challenge‚ often stemming from inconsistent fan creation or placement during the initial mapping process. Carefully analyze both eyes to pinpoint specific areas of imbalance – are the lengths differing‚ or is the spacing irregular?
Begin by assessing the natural lash growth patterns; sometimes‚ inherent differences between the eyes contribute to asymmetry. Strategic gap fills with appropriately sized extensions can correct sparse areas. If length discrepancies exist‚ gently remove a few extensions from the fuller eye and add similar lengths to the sparser side.
Remember to maintain a consistent curl and diameter throughout the correction. Avoid adding excessive volume to compensate‚ as this can exacerbate the imbalance. Prioritize a balanced‚ natural look‚ and always double-check your work under different lighting conditions to ensure symmetry.
Correcting Mapping Mistakes
Discovering a mapping mistake post-application can be stressful‚ but it’s often rectifiable! First‚ identify the error – is it a length‚ curl‚ or placement issue? Carefully remove the incorrectly placed extensions using an lash extension remover‚ ensuring no damage to the natural lashes.
Avoid impulsive corrections; take a step back and reassess the overall design. Refer back to your initial mapping plan or consult with a colleague for a fresh perspective. Re-map the area‚ considering the client’s eye shape and desired look.
When re-applying‚ prioritize precision and consistency. Document the correction in your client’s record to prevent recurrence. Remember‚ transparency with your client is key – explain the mistake and the corrective action taken‚ building trust and demonstrating professionalism.
Client Consultation & Lash Mapping Preferences
A thorough client consultation is paramount before any lash application. Discuss their desired look – natural‚ dramatic‚ cat-eye‚ or doll-eye – and understand their lifestyle. Inquire about any allergies or sensitivities. Assess their eye shape meticulously‚ noting any unique characteristics like hooded lids or wide-set eyes.
Present mapping options visually‚ using diagrams or photos to illustrate different styles. Encourage clients to share inspiration images. Confirm their preferences regarding length‚ curl‚ and volume‚ explaining how these choices impact the final result.
Document all preferences clearly in their client record. Always prioritize client comfort and satisfaction‚ tailoring the mapping to enhance their individual beauty and build lasting relationships.