
VEVOR Heat Press Manual PDF: A Comprehensive Guide
Discover essential VEVOR heat press resources, including detailed PDF manuals, for optimal hat printing success. Access guides for 5-in-1 models and troubleshooting tips!
VEVOR has rapidly become a prominent name in the heat press industry, offering a diverse range of machines catering to both beginners and seasoned professionals. Their commitment to affordability without compromising quality has made them a popular choice.
Understanding the intricacies of your VEVOR heat press is crucial for achieving professional-grade results. This begins with accessing and thoroughly reviewing the official VEVOR heat press manual PDF. These manuals provide vital information on setup, operation, safety, and maintenance, ensuring longevity and optimal performance of your equipment. Explore the various models available!
Understanding the VEVOR Hat Heat Press
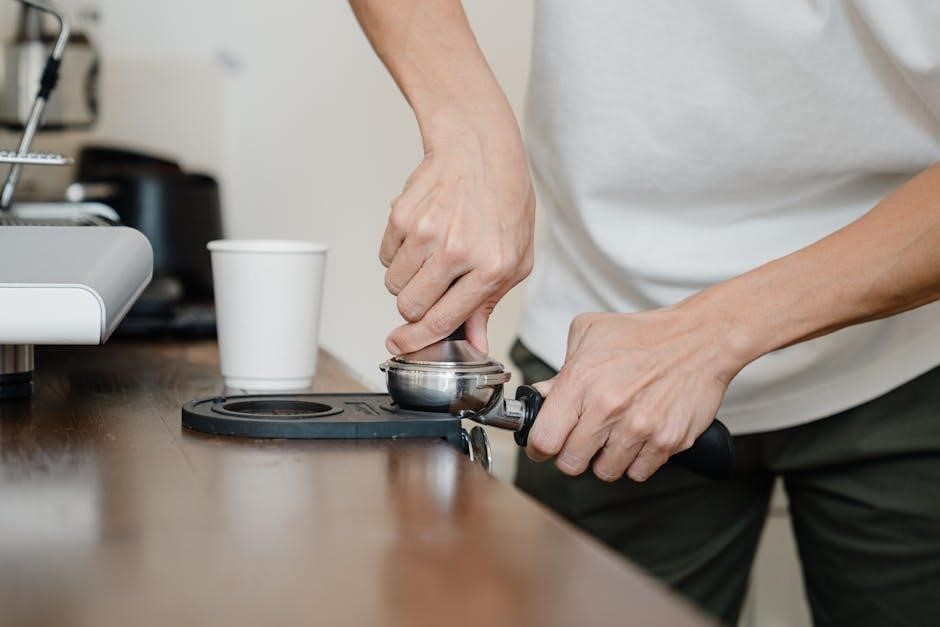
VEVOR’s hat heat press is specifically engineered for applying designs onto curved surfaces like baseball caps. Key features include adjustable pressure settings, ensuring secure contact with various hat types, and a user-friendly digital controller for precise temperature and time adjustments.
The manual PDF details the hat attachment’s functionality, emphasizing proper alignment and transfer techniques. Familiarizing yourself with these specifics, found within the downloadable guide, is essential for preventing common issues like faded transfers or uneven application. Mastering this tool unlocks professional hat customization!

Setting Up Your VEVOR Heat Press
Proper setup, guided by the VEVOR manual PDF, ensures safe and efficient operation. Carefully unpack components, connect power, and adjust settings for optimal results.
Unboxing and Component Check
Upon receiving your VEVOR heat press, carefully unpack all components. Refer to the included parts list within the manual PDF to verify everything is present. Inspect for any shipping damage – note any issues immediately. Confirm you have the heat press itself, the hat mold (if applicable), Teflon sheets, and any accompanying accessories. Ensure the power cord is undamaged. Familiarize yourself with each part before proceeding. A thorough component check, guided by the VEVOR manual, prevents issues later and ensures a smooth setup process. Retain the packaging for potential returns or warranty claims.
Power Connection and Safety Precautions
Before connecting your VEVOR heat press, verify your power outlet matches the machine’s voltage requirements – detailed in the PDF manual. Always use a grounded outlet to prevent electrical shock. Never operate with a damaged power cord. Ensure the heat press is on a stable, heat-resistant surface. Keep flammable materials away. Avoid touching the hot platen during or immediately after operation. Read the safety guidelines in the manual thoroughly. Proper ventilation is crucial. Always disconnect the power when not in use or during maintenance.
Adjusting Pressure and Time Settings
Refer to the VEVOR heat press manual PDF for specific settings based on your transfer material and fabric type. Begin with recommended settings and perform test presses. Adjust pressure using the machine’s knob – higher for thicker materials. Set the timer accurately for consistent results. Insufficient time or pressure leads to poor adhesion; excessive settings can cause damage. Consult the manual’s charts for optimal combinations. Document your successful settings for future projects. Precise adjustments are key to professional-quality transfers.

Operating the VEVOR Hat Heat Press
Follow the VEVOR manual PDF for detailed hat printing instructions. Prepare your hat, apply transfers, and execute the heat pressing process for professional results!
Preparing Your Hat for Printing
Before initiating the heat press process, meticulous hat preparation is crucial for optimal transfer adhesion. Consult your VEVOR heat press manual PDF for specific guidance. Ensure the hat’s surface is smooth, lint-free, and dry. Use a lint roller to remove any debris. Properly position the transfer paper or vinyl onto the hat, accounting for desired placement. Secure the material with heat-resistant tape to prevent shifting during pressing. Verify the hat is compatible with the chosen transfer material, referencing the VEVOR manual for fabric recommendations. Incorrect preparation can lead to flawed prints, so attention to detail is paramount.
Applying Transfer Paper or Vinyl
Carefully apply your chosen transfer material – paper or vinyl – to the prepared hat, referencing the VEVOR heat press manual PDF for specifics. Ensure the design is correctly oriented before application. For transfer paper, use a carrier sheet if required, following the manufacturer’s instructions detailed in the manual. With vinyl, weed away excess material, leaving only the desired design. Secure the transfer with heat-resistant tape to prevent movement during pressing. Confirm proper adhesion and alignment before proceeding, as adjustments are difficult once heat is applied.
The Heat Pressing Process – Step-by-Step
Consult the VEVOR heat press manual PDF for precise time and temperature settings based on your material. Position the hat securely on the platen, ensuring even contact. Close the heat press, applying the pre-set pressure. Monitor the timer, avoiding premature opening. Refer to the manual for recommended pressing durations. Once the timer signals completion, carefully open the press. Avoid sudden movements to prevent shifting. This step, guided by the manual, ensures a quality transfer. Remember safety precautions throughout the process.
Cooling and Removing the Finished Product
Allow the transferred hat to cool completely before removal, as detailed in the VEVOR manual PDF. Avoid peeling the transfer paper while hot, which can cause adhesion issues. Gently lift the hat from the platen, checking for complete transfer. If any areas are incomplete, re-press briefly, consulting the manual for adjustments. Carefully peel away the transfer paper, following the manual’s recommended method – hot or cold peel. Inspect the finished product for quality and durability.

Troubleshooting Common Issues
Resolve frequent problems like temperature inconsistencies, uneven pressure, and transfer failures using the VEVOR heat press manual PDF’s diagnostic guidance. Ensure optimal results!
Temperature Inconsistencies
Addressing temperature fluctuations is crucial for consistent heat transfers. Consult the VEVOR heat press manual PDF to verify correct temperature settings and calibration procedures. Check the heating element for damage or debris, as this can cause uneven heating. Ensure the thermostat is functioning correctly; a faulty thermostat will lead to inaccurate temperature readings.
Review the manual’s section on power supply stability, as voltage drops can impact heating performance. Confirm proper platen contact; gaps can create hot spots. If inconsistencies persist, contact VEVOR support for further assistance, referencing the manual’s troubleshooting steps.
Uneven Pressure Application
Achieving uniform pressure is vital for successful transfers; the VEVOR manual PDF details adjustment procedures. Inspect the pressure adjustment knob or mechanism for proper functionality, ensuring it’s not stripped or loose. Verify the hat platen is clean and free of obstructions that could impede even contact.
Consult the manual for recommended pressure settings based on fabric type and transfer material. Confirm the hat is positioned correctly on the platen. If issues persist, review the manual’s troubleshooting section or contact VEVOR support for guidance.
Transfer Issues (Fading, Peeling)
Addressing fading or peeling transfers requires careful review of the VEVOR manual PDF. Ensure the correct temperature, time, and pressure settings are applied, as specified for your transfer material and fabric. Verify the transfer paper or vinyl is of high quality and properly adhered to the fabric.
Check for adequate cooling time before removing the transfer. Consult the manual for recommended washing instructions to prevent premature deterioration. If problems continue, explore alternative transfer materials or adjust settings slightly.
Maintenance and Care
Prolong your VEVOR heat press’s life with regular cleaning, Teflon sheet checks, and proper storage—refer to the manual PDF for detailed guidance!
Cleaning the Heat Platen
Maintaining a clean heat platen is crucial for consistent, high-quality transfers. Always disconnect the VEVOR heat press from the power source before cleaning. Allow the platen to cool completely to avoid burns. Use a soft, non-abrasive cloth dampened with isopropyl alcohol to gently wipe away any residue, such as transfer paper adhesive or ink marks.
Avoid harsh chemicals or scouring pads, as these can damage the platen’s surface. Refer to your VEVOR heat press manual PDF for specific cleaning recommendations and warnings. Regular cleaning prevents build-up, ensuring even heat distribution and preventing unwanted marks on your finished products. A clean platen equals better results!
Checking and Replacing Teflon Sheets
Teflon sheets protect your heat platen and prevent materials from sticking during the heat pressing process. Regularly inspect your VEVOR heat press’s Teflon sheets for signs of wear, scorching, or bubbling – detailed in the manual PDF. Replace damaged sheets immediately to maintain optimal performance and prevent damage to your platen or transfers.
Ensure the replacement sheet is the correct size for your platen. Follow the instructions in your VEVOR manual PDF for proper installation. Using high-quality Teflon sheets extends the life of your equipment and ensures consistent, professional results. Don’t compromise on quality!
Long-Term Storage Guidelines
Proper storage, as detailed in the VEVOR heat press manual PDF, is crucial for longevity. Ensure the machine is completely cool and clean before storage. Cover it with a dust cover to protect against debris. Store in a dry, climate-controlled environment to prevent rust or corrosion.
Disconnect the power cord and store it separately. Refer to the manual PDF for specific instructions regarding attachments. Avoid stacking heavy items on top of the heat press. Following these guidelines will ensure your VEVOR machine is ready for use when you need it!
Downloading the VEVOR Heat Press Manual PDF
Find the official VEVOR heat press manual PDF directly on their website. Explore alternative sources if needed, and check revision dates for accuracy.
Locating the Official PDF on VEVOR’s Website
Begin your search for the VEVOR heat press manual PDF by visiting the official VEVOR website. Navigate to the “Support” or “Downloads” section, often found in the website’s footer. Utilize the search bar, entering keywords like “heat press manual,” “hat heat press,” or the specific model number of your machine.
Browse the available documents, looking for a PDF file clearly labeled as the user manual. Ensure the document corresponds to your exact VEVOR heat press model to avoid compatibility issues. Download the PDF and save it to a convenient location on your computer for easy access. Confirm the file opens correctly and contains the information you need.
Alternative Sources for the Manual
If the official VEVOR website proves unhelpful, explore alternative sources for the heat press manual PDF. Check online forums and communities dedicated to heat pressing and DIY projects; users often share manuals. Search platforms like YouTube for video tutorials that may link to downloadable resources.
Be cautious when downloading from unofficial sources, verifying file safety with antivirus software. Consider contacting VEVOR’s customer support directly, requesting a digital copy of the manual. Remember to specify your heat press model number for accurate assistance.
Understanding Manual Revision Dates
Pay close attention to the revision date on the VEVOR heat press manual PDF. This indicates the document’s currency and whether it reflects the latest updates to your machine’s functionality. Newer revisions often include crucial safety information, troubleshooting guides, and corrected procedures.
Always prioritize using the most recent version available. If your manual lacks a clear date, contact VEVOR support to confirm its validity. Using an outdated manual could lead to improper operation or even damage to your heat press.
Advanced Techniques & Tips
Explore optimal settings for diverse fabrics and transfer materials. Master complex transfer solutions and unlock the full potential of your VEVOR heat press!
Using Different Transfer Materials
VEVOR heat presses accommodate various transfer types, each demanding specific settings for optimal adhesion. Understanding these nuances is crucial for professional results. Experiment with sublimation paper for vibrant, full-color designs on polyester fabrics, adjusting temperature and pressure accordingly.
For vinyl transfers, utilize lower temperatures and pressures to prevent melting or peeling. Consider glitter vinyl’s unique requirements, often needing increased dwell times. Always consult the transfer material manufacturer’s guidelines alongside your VEVOR manual for precise recommendations. Proper material selection and setting adjustments guarantee lasting, high-quality transfers.
Optimizing Settings for Various Fabrics
Achieving flawless transfers hinges on tailoring heat press settings to the fabric type. Polyester requires higher temperatures and dwell times compared to cotton, ensuring deep dye penetration. Cotton benefits from moderate heat and pressure, preventing scorching.
Delicate fabrics like rayon or silk demand lower temperatures and gentle pressure to avoid damage; Always perform test presses on scrap material before committing to a full run. Refer to your VEVOR manual and transfer paper instructions for specific guidance. Precise adjustments yield vibrant, durable prints on any fabric.
Troubleshooting Complex Transfer Problems
Complex transfer issues often stem from multiple factors. If fading occurs, increase temperature or dwell time, ensuring adequate pressure. Peeling suggests insufficient heat or pressure; verify Teflon sheet condition. Ghosting indicates movement during pressing – secure the transfer firmly.
Color inconsistencies may relate to fabric type or transfer paper quality. Consult the VEVOR manual’s troubleshooting section and experiment with settings. Document each test to pinpoint the optimal solution. Remember, consistent pressure and temperature are crucial for reliable results.
Safety Guidelines
Prioritize safety! Avoid burns with heat-resistant gloves and maintain proper ventilation. Familiarize yourself with emergency shut-off procedures detailed in the VEVOR manual.
Avoiding Burns and Electrical Hazards
Always wear heat-resistant gloves when operating the VEVOR heat press to prevent severe burns from the hot platen and components. Ensure the machine is placed on a stable, level surface, away from flammable materials. Never touch the heating element during or immediately after use.
Inspect power cords regularly for damage and avoid using the machine if any electrical issues are detected. Disconnect the power supply before performing maintenance or cleaning. Follow the grounding instructions in the VEVOR manual to minimize electrical shock risks. Keep children and unauthorized personnel away from the operating area.
Proper Ventilation Practices
Ensure adequate ventilation in the workspace when using your VEVOR heat press, as the heating process can release fumes from transfer materials and fabrics. Open windows or use an exhaust fan to circulate air and prevent the buildup of potentially harmful vapors.
Avoid operating the heat press in enclosed spaces with limited airflow. Consider using a fume extractor for prolonged or frequent use. Refer to the VEVOR manual for specific recommendations regarding ventilation based on the materials you are using. Prioritize a well-ventilated environment for a safe and comfortable working experience.
Emergency Shut-Off Procedures
Familiarize yourself with the VEVOR heat press’s emergency shut-off procedures detailed in the manual. Locate the power switch and understand how to quickly disconnect the machine from its power source.
In case of malfunction, smoke, or any unusual occurrence, immediately switch off the power and unplug the heat press. Ensure the area is safe before attempting any inspection. Keep a fire extinguisher nearby and know how to use it. Review the manual’s safety section for comprehensive emergency guidelines.

VEVOR 5-in-1 Heat Press Specifics
Explore the versatile functions of the VEVOR 5-in-1 heat press, detailed in its manual. Learn attachment switching and optimized settings for each application.
Understanding the Multiple Functions
The VEVOR 5-in-1 heat press isn’t limited to hats; its manual details capabilities for flat fabrics, mugs, plates, and even caps. Each function requires specific attachments, clearly illustrated within the PDF guide. Understanding these distinctions is crucial for achieving professional results; The manual provides detailed diagrams showing proper attachment installation and removal. Furthermore, it outlines the unique temperature, time, and pressure settings needed for each material and application, ensuring optimal transfer quality and preventing damage. Mastering these functions expands your creative possibilities significantly.
Switching Between Attachments
The VEVOR heat press manual PDF provides step-by-step instructions for safely swapping attachments. It emphasizes powering down and unplugging the machine before any changes. Detailed diagrams illustrate the correct alignment and locking mechanisms for each component – flat platen, mug press, cap press, and plate attachments. The guide stresses the importance of secure attachment to prevent accidents and ensure even pressure distribution. Incorrect installation can lead to uneven transfers or damage to the machine. Always refer to the manual for specific attachment procedures.
Specific Settings for Each Function
The VEVOR heat press manual PDF outlines precise temperature, time, and pressure settings for each function. For example, mug pressing requires lower temperatures and shorter durations than t-shirt transfers. Cap pressing demands specific platen curvature and pressure adjustments. The manual details these nuances, preventing scorching or faded prints. It also includes a chart correlating fabric types with optimal settings. Ignoring these recommendations can compromise transfer quality. Always consult the PDF for the correct parameters before initiating any heat press operation.

Warranty Information & Support
Explore VEVOR’s warranty coverage details within the heat press manual PDF. Find contact information for customer support and learn how to register your new machine!
VEVOR’s Warranty Coverage
Understanding your VEVOR heat press warranty is crucial for peace of mind. The official manual PDF outlines specific coverage details, typically including a period of protection against manufacturing defects. Review the document carefully to note the warranty duration – often one year from the purchase date – and what components are covered.
Generally, the warranty doesn’t extend to issues arising from misuse, improper maintenance, or normal wear and tear. Keep your proof of purchase readily available, as it’s required for any warranty claim. Refer to the PDF for detailed instructions on initiating a claim and the required documentation.
Contacting VEVOR Customer Support
Need assistance with your VEVOR heat press? The official manual PDF often includes contact information for their customer support team. Typically, you can reach them via email, found within the document, for technical questions or warranty claims. Explore VEVOR’s official website for a dedicated support section, potentially offering live chat options.
Prepare your heat press model number and purchase details before contacting support for faster assistance. Consider checking their FAQ section online; it may resolve common issues quickly. Remember to clearly describe your problem when reaching out to ensure efficient troubleshooting.
Registering Your Heat Press
Registering your VEVOR heat press is crucial for warranty validation and accessing exclusive support. Check the included documentation or the official VEVOR website for the registration process; the manual PDF may contain a direct link. Typically, registration requires your purchase details and heat press model number.
Benefits include streamlined warranty claims, access to updated software or firmware, and potential notifications about new features or troubleshooting guides. Ensure accurate information during registration to avoid delays or complications with future support requests. Keep your registration confirmation for your records.