
Welcome! This manual provides essential instructions for your GE Portable Dishwasher, ensuring optimal performance and longevity.
It details safety guidelines, operation, and troubleshooting, helping you maximize your appliance’s benefits.
This guide is intended to help you understand and operate your dishwasher effectively.
Understanding the Manual’s Purpose
This owner’s manual serves as a comprehensive resource for your GE Portable Dishwasher, offering vital use and care guidelines. It’s designed to empower you with the knowledge to safely and efficiently operate your appliance, maximizing its lifespan and cleaning performance.
Within these pages, you’ll find detailed installation instructions, ensuring proper setup for optimal functionality. Furthermore, the manual provides a clear overview of features, allowing you to fully utilize the capabilities of your dishwasher.
Crucially, it includes essential safety instructions and warnings to prevent accidents and ensure responsible use. You’ll also discover valuable troubleshooting tips to address common issues, potentially saving you time and service calls. Access quick spec literature and energy guides for informed usage.
Safety Instructions & Warnings
Important Safety Precautions: To prevent injury or damage, carefully read and adhere to all warnings and instructions within this manual. Never operate the dishwasher if it’s damaged, and always disconnect power before maintenance.
Electrical Safety: Ensure proper grounding to avoid shock hazards. Do not use extension cords. Installation must comply with local codes; improper installation voids the GE Appliances Warranty.
Chemical Safety: Use only detergents and rinse aids approved for dishwashers. If rinse agent is spilled, wipe it up immediately to avoid irritation. Keep these products out of reach of children. Avoid storing flammable materials near the dishwasher.
Operational Safety: Do not allow children to operate or play with the dishwasher. Supervise use around the appliance.

Installation Guide
Proper installation is crucial for optimal performance. This section details connecting the water supply, setting up drainage, and meeting electrical requirements for your GE dishwasher.
Connecting Water Supply
Connecting your GE portable dishwasher to the water supply is a vital step in the installation process. Ensure you have a standard household water faucet with a 3/4-inch threaded connection. An adapter may be required if your faucet has a different size.
Carefully attach the water supply hose to both the faucet and the dishwasher’s inlet valve, ensuring a tight, leak-proof connection. Hand-tighten initially, then use pliers gently to secure further.
Important: Improper installation can lead to water damage and is not covered under the GE Appliances Warranty. Always check for leaks after connecting the hose before operating the dishwasher. Consider using plumber’s tape on the threads for an extra secure seal.
Follow all local plumbing codes.
Drainage Setup
Proper drainage is crucial for your GE portable dishwasher’s performance. This model requires a standard kitchen sink drain connection. The dishwasher comes equipped with a drain hose that needs to be securely attached to a suitable drain fitting.
Ensure the drain hose is not kinked or obstructed, as this can cause drainage issues. Position the hose securely in the sink drain, utilizing the provided clamp to prevent accidental dislodgement during operation.
Important: Incorrect drainage setup can lead to water backup and potential damage. The installation is the responsibility of the installer, and product failure due to improper setup isn’t covered by the GE warranty.
Verify a clear drainage path before each cycle.
Electrical Requirements
Your GE portable dishwasher requires a standard 120V, 60Hz electrical supply. Important: It’s crucial to use a dedicated, grounded electrical outlet. Avoid using extension cords or adapters, as they can pose a safety hazard and potentially damage the appliance.
The dishwasher’s power cord has a three-prong grounding plug for your protection. Never remove or alter this plug. Ensure the outlet is easily accessible for disconnection in case of emergencies.
Caution: Improper electrical connection voids the GE Appliances Warranty. Installation must adhere to local electrical codes. Product failure resulting from incorrect electrical setup is not covered. Always consult a qualified electrician if you have any concerns regarding your electrical system.

Operating Your Dishwasher
Begin by familiarizing yourself with the control panel and proper loading techniques. Utilize appropriate detergent and rinse aid for optimal cleaning results.
Control Panel Overview
The control panel is your command center for operating the dishwasher. It features a power button to initiate cycles, and cycle selection buttons for Normal, Heavy Duty, and Quick Wash options.
Additional features may include a Sanitize cycle and a delay start function, allowing you to schedule washes for convenience.
Indicator lights display the cycle status, alerting you when the wash is in progress, complete, or if there’s a need for attention, such as low rinse aid.
Some models include options for heated drying or a rinse-only cycle. Refer to the panel’s diagram within this manual for specific button locations and functions related to your GE dishwasher model.

Understanding these controls ensures efficient and customized cleaning.
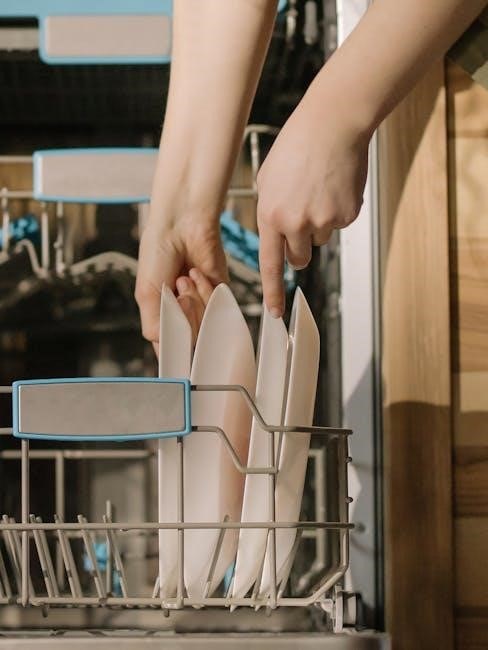
Loading the Dishwasher Correctly
Proper loading maximizes cleaning performance. Arrange dishes so water reaches all surfaces; avoid overcrowding. Place larger items on the bottom rack, ensuring they don’t block the spray arm.
Face soiled surfaces towards the center. Secure items like bowls and cups to prevent shifting during the wash cycle.
The upper rack is ideal for glasses, smaller bowls, and plastic containers. Ensure tall items don’t obstruct the upper spray arm’s rotation.
Silverware should be placed in the utensil basket with handles down for optimal cleaning. Avoid nesting silverware, allowing water to circulate freely.
Consult the GE dishwasher manual for specific rack configurations and loading recommendations for your model.
Detergent & Rinse Aid Usage
Use only detergents specifically formulated for automatic dishwashers. Refer to your GE dishwasher manual for recommended detergent types and quantities, as these can vary based on water hardness.
Avoid using hand dish soap, as it creates excessive suds and can damage the appliance.
Fill the detergent dispenser before each wash cycle, ensuring it closes securely.
Rinse aid helps dishes dry spot-free by reducing water surface tension. Fill the rinse aid dispenser regularly, adjusting the dosage based on water hardness and desired drying performance.
Wipe up any spilled detergent or rinse aid immediately to prevent corrosion or damage.
Wash Cycles Explained
Your GE dishwasher offers various cycles – Normal, Heavy Duty, and Quick Wash – to accommodate different cleaning needs and soil levels.
Select the appropriate cycle for optimal results.
Normal Wash Cycle
The Normal Wash Cycle is designed for everyday dishwashing needs, effectively cleaning normally soiled dishes, glasses, and cookware. This cycle balances cleaning power with energy and water efficiency, making it ideal for regular use.
It utilizes a moderate water temperature and spray intensity to remove food residue without being overly harsh on delicate items.
For best results, load dishes according to the “Loading the Dishwasher Correctly” section of this manual.
Ensure proper detergent and rinse aid usage, as outlined in the corresponding section. This cycle is suitable for a full load of dishes and typically runs for a moderate duration, providing a thorough clean without excessive water consumption.
It’s a versatile option for most daily dishwashing tasks.
Heavy Duty Wash Cycle
The Heavy Duty Wash Cycle is specifically engineered for tackling heavily soiled dishes, pots, pans, and casserole dishes with baked-on food residue. This cycle employs higher water temperatures and increased spray pressure to deliver a powerful cleaning performance.
It’s ideal for items that require intense scrubbing and a more thorough wash.
Pre-scraping large food particles is recommended before loading.
Utilize a higher dosage of detergent, following the guidelines in the “Detergent & Rinse Aid Usage” section, to ensure optimal cleaning. This cycle typically has a longer duration than other wash cycles due to its intensified cleaning process.
It’s best suited for full loads of heavily soiled items, providing a robust clean for challenging messes.
Quick Wash Cycle
The Quick Wash Cycle is designed for lightly soiled dishes that require a fast and efficient cleaning. This cycle utilizes lower water temperatures and a shorter wash duration, making it perfect for everyday use when dishes aren’t heavily burdened with food residue.
It’s an excellent option when you need dishes cleaned quickly without compromising cleanliness.
While convenient, it’s not recommended for heavily soiled items or baked-on food.
Use a standard amount of detergent as indicated in the “Detergent & Rinse Aid Usage” section. This cycle prioritizes speed and efficiency, offering a convenient solution for lightly soiled loads.
It’s ideal for smaller loads or when time is of the essence.

Maintenance & Cleaning
Regular maintenance ensures optimal performance. Clean the filter frequently, wipe up rinse agent spills immediately, and clean the exterior with a damp cloth.
Cleaning the Filter
Maintaining a clean filter is crucial for optimal dishwasher performance. Food particles and debris can accumulate, leading to reduced cleaning effectiveness and potential drainage issues. Your GE dishwasher filter requires regular inspection and cleaning.
To access the filter, locate it at the bottom of the dishwasher’s interior. Carefully remove the lower rack to gain access. Twist the filter assembly counterclockwise to unlock and lift it out.
Rinse the filter under warm running water, using a soft brush to remove stubborn residue. Ensure all openings are clear of blockage. Reinstall the filter by aligning it correctly and twisting clockwise to lock it into place. A clean filter ensures sparkling dishes and prolongs your dishwasher’s lifespan.
Exterior Cleaning Instructions
Keeping the exterior of your GE portable dishwasher clean enhances its appearance and prevents buildup. Regularly wipe down the exterior surfaces with a damp, soft cloth. For stainless steel models, use a stainless steel cleaner to avoid streaks and maintain shine.
Avoid abrasive cleaners, scouring pads, or harsh chemicals, as these can damage the finish. Mild dish soap diluted in water is generally safe and effective. Pay attention to the control panel, wiping away any spills or splatters promptly.
Ensure the dishwasher is disconnected from power before cleaning. Dry the exterior thoroughly after cleaning to prevent water spots. Consistent exterior cleaning contributes to the longevity and aesthetic appeal of your appliance.
Dealing with Rinse Agent Spills
Rinse agent spills, while uncommon, require immediate attention. Rinse agent is designed to aid drying, but direct contact can cause irritation. Always wipe up spills immediately with a damp cloth or sponge. Avoid letting the rinse agent sit on surfaces, as it can leave a sticky residue.
Ensure the area is thoroughly rinsed with clean water after wiping. If the spill occurs inside the dishwasher, run a short rinse cycle to flush out any remaining agent. Prevent future spills by carefully filling the rinse agent dispenser and avoiding overfilling.
Proper handling minimizes potential issues and maintains the dishwasher’s performance.

Troubleshooting Common Issues
Facing problems? This section offers solutions for typical issues like the dishwasher not starting, poor cleaning, or drainage problems.
Resolve issues quickly and efficiently with our helpful guide!
Dishwasher Not Starting
Problem: Your GE portable dishwasher isn’t powering on. First, verify the power cord is securely plugged into a functioning electrical outlet. Check your home’s circuit breaker or fuse box to ensure the circuit hasn’t tripped or blown.
Next, confirm the dishwasher door is fully latched; a safety mechanism prevents operation if the door isn’t properly closed. Also, examine the control panel for any error codes displayed, referencing the manual for their specific meanings.
If these steps don’t resolve the issue, there might be a problem with the dishwasher’s internal components. Contact a qualified appliance repair technician for assistance. Do not attempt to repair the dishwasher yourself, as this could void the warranty and pose a safety risk.
Poor Cleaning Performance
Experiencing less-than-sparkling dishes? Several factors can contribute to poor cleaning. Ensure dishes are loaded correctly, avoiding overcrowding and blocking spray arms. Use a sufficient amount of detergent appropriate for your water hardness – consult the detergent packaging for guidance.
Verify the dishwasher filter is clean; a clogged filter restricts water circulation. Also, check the spray arms for blockages and ensure they rotate freely. Consider using a rinse aid to improve drying and reduce water spots.
If problems persist, select a more intensive wash cycle like ‘Heavy Duty’. Finally, confirm your water temperature reaches at least 120°F (49°C) for optimal cleaning.
Drainage Problems
Encountering standing water in your dishwasher? First, verify the drain hose isn’t kinked or clogged. Ensure it’s properly connected to the sink drain or garbage disposal. Check the garbage disposal (if connected) is clear and functioning correctly – run it briefly before operating the dishwasher.
Inspect the dishwasher filter for debris, as a blocked filter can impede drainage. A clogged air gap (if installed) can also cause issues; clean it regularly. If the problem continues, examine the drain pump for obstructions.

Improper installation can also lead to drainage issues; ensure correct setup. Product failure due to incorrect installation isn’t covered under warranty.

Warranty Information
GE Appliances provides warranty coverage for your dishwasher against defects in materials and workmanship. See included documentation for coverage details and exclusions.

Coverage Details
Your GE Portable Dishwasher is covered for one year from the original purchase date against defects in materials or workmanship. GE will provide, free of charge, labor and parts to repair or replace any part of the dishwasher proven defective during this period. This warranty extends to the original purchaser and subsequent owners for the remaining warranty period.
For warranty service, contact GE Appliances at the number provided in your documentation or through their website. Proper installation is crucial; product failure due to improper installation isn’t covered. Keep your proof of purchase readily available, as it’s required for all warranty claims. This warranty offers peace of mind, ensuring your appliance functions as intended.
Exclusions
This warranty does not cover damage resulting from misuse, abuse, accidents, alterations, or improper installation. Cosmetic damage, such as scratches or dents, is also excluded. Damage caused by power surges, inadequate water supply, or improper detergents are not covered under warranty terms.
Furthermore, the warranty doesn’t extend to parts that are subject to normal wear and tear, like filters. Any repairs performed by unauthorized service providers will void the warranty. GE Appliances is not responsible for incidental or consequential damages. See the full warranty document for complete details and limitations.