Manual coffee makers offer a delightful‚ hands-on brewing experience‚ blending precision with style. These compact devices deliver nuanced flavors‚ appealing to coffee enthusiasts seeking control.
From glass to stainless steel‚ diverse materials and customizable options cater to individual preferences‚ ensuring a satisfying daily ritual.

Enjoy the art of coffee making with these accessible and rewarding brewing companions‚ perfect for any coffee lover!
What is a Manual Coffee Maker?
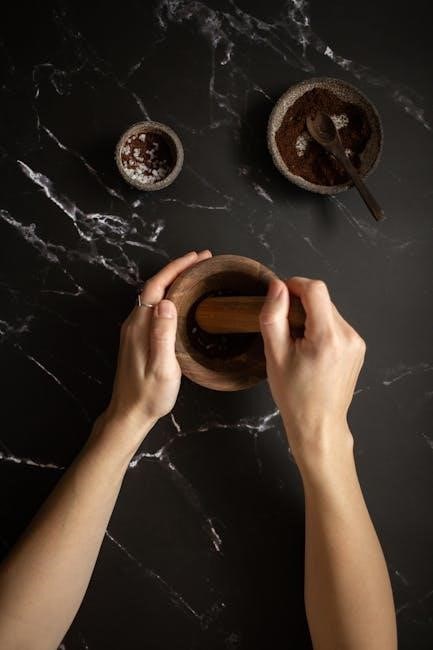
Manual coffee makers represent a brewing method where the user actively controls the entire process‚ unlike automatic machines. They don’t rely on electricity for the core brewing function‚ offering a more tactile and involved experience. These devices come in various forms‚ including pour-over setups‚ French presses‚ and stovetop percolators‚ each delivering a unique flavor profile.
Essentially‚ a manual coffee maker requires your direct participation – from heating the water to carefully pouring it over the grounds‚ and monitoring the brewing time. This hands-on approach allows for greater customization and control over variables like water temperature‚ bloom time‚ and saturation‚ ultimately influencing the final cup’s taste. They are celebrated for producing a flavorful and nuanced coffee‚ often preferred by those who appreciate the art of coffee brewing.
Benefits of Using a Manual Coffee Maker
Manual coffee makers offer a wealth of advantages for the discerning coffee drinker. They are remarkably compact‚ making them ideal for small kitchens or travel‚ unlike bulky automatic machines. Beyond space-saving‚ they provide cost-effectiveness‚ eliminating the need for expensive electricity consumption during brewing.
Perhaps the greatest benefit is the control they offer. You dictate every aspect of the brewing process‚ tailoring it to your exact preferences. This leads to a more flavorful and nuanced cup‚ often surpassing the quality of automated brews. Furthermore‚ manual methods encourage a mindful‚ ritualistic experience‚ transforming coffee making into a moment of calm and enjoyment. They are also generally easier to clean and maintain.
Understanding Your Coffee Maker Components
Key components include the carafe‚ filter basket (accepting paper or permanent filters)‚ and water reservoir. Each element plays a vital role in achieving optimal brewing results.
Familiarizing yourself with these parts ensures proper usage and maintenance for consistently delicious coffee.
The Carafe: Materials and Care
The carafe‚ often crafted from glass‚ ceramic‚ or stainless steel‚ is central to your manual coffee maker. Glass carafes offer visibility‚ allowing you to observe the brewing process‚ but require careful handling due to fragility. Ceramic provides excellent heat retention‚ keeping your coffee warmer for longer‚ while stainless steel is durable and resists staining.
Proper care is crucial. Never place your carafe in a microwave‚ dishwasher‚ or on a hotplate‚ as this can cause damage. Handwashing with warm‚ soapy water is recommended. Avoid abrasive cleaners that may scratch the surface. For stubborn stains‚ a mixture of baking soda and water can be effective. Regularly inspect for cracks or chips‚ replacing the carafe if necessary to ensure safe and optimal performance.
Maintaining your carafe extends its lifespan and preserves the quality of your brewed coffee.
Filter Basket: Paper vs. Permanent Filters
The filter basket houses your chosen filtration method – paper or permanent. Paper filters are disposable‚ providing a clean cup by trapping oils and sediment‚ resulting in a brighter‚ clearer brew. They are inexpensive and readily available‚ but require frequent replacement.
Permanent filters‚ typically made of nylon or metal‚ are reusable and environmentally friendly. While convenient‚ they allow more oils to pass through‚ creating a fuller-bodied‚ richer flavor. Regular cleaning is essential to prevent buildup and maintain optimal performance.
The choice depends on your preference: clarity and convenience with paper‚ or richness and sustainability with permanent filters.
Water Reservoir: Capacity and Filling
The water reservoir holds the water used for brewing. Capacity varies between models‚ influencing how much coffee you can make at once. Always check your coffee maker’s specifications to determine its maximum fill line.
Use fresh‚ filtered water for the best flavor. Avoid using distilled water‚ as it lacks the minerals needed for optimal extraction. Fill the reservoir carefully‚ avoiding spills‚ and ensure the water level is within the indicated range.
Proper filling ensures consistent brewing and prevents damage to the machine. Regularly clean the reservoir to prevent mineral buildup and maintain water quality.

Preparing for Your First Brew
Before brewing‚ select the correct coffee grind‚ use quality water‚ and measure accurately. These steps are crucial for a flavorful‚ satisfying cup of coffee.
Choosing the Right Coffee Grind
Selecting the appropriate coffee grind is paramount for optimal extraction and flavor. Manual coffee makers generally perform best with a medium-coarse grind‚ resembling coarse sand. A grind that’s too fine can lead to over-extraction‚ resulting in a bitter taste‚ while a grind that’s too coarse will under-extract‚ producing a weak and sour brew.
Consider the specific type of manual coffee maker you’re using; pour-over methods often benefit from a slightly finer grind within the medium range. Experimentation is key! Start with a medium-coarse grind and adjust based on your taste preferences. Freshly grinding your beans just before brewing is highly recommended to preserve aroma and maximize flavor complexity. Pre-ground coffee loses its potency quickly.
Water Quality: Importance and Recommendations
Water quality significantly impacts the final taste of your coffee. Since coffee is approximately 98% water‚ using filtered water is crucial. Avoid using tap water directly‚ as chlorine and other impurities can negatively affect the flavor profile‚ resulting in a dull or unpleasant brew.
Ideally‚ use filtered water or spring water with a balanced mineral content. Distilled water‚ while pure‚ lacks the minerals needed for optimal extraction. Water temperature is also vital; aim for around 200°F (93°C) – just off the boil. Using water that’s too hot can scorch the grounds‚ while water that’s too cool won’t fully extract the flavors.
Measuring Coffee: Achieving the Perfect Ratio
Achieving the ideal coffee-to-water ratio is fundamental to a delicious brew. A general guideline is a 1:16 ratio – one gram of coffee for every 16 grams of water. However‚ personal preference plays a significant role‚ so experimentation is encouraged!
For a standard cup (approximately 8 ounces)‚ start with 2 tablespoons (around 10-12 grams) of ground coffee. Use a kitchen scale for precise measurements‚ ensuring consistency. Adjust the amount of coffee based on your desired strength; more coffee yields a bolder flavor‚ while less results in a milder cup. Consistent measurements are key to replicating your perfect brew.

Brewing Instructions: Step-by-Step Guide
Begin your brewing journey by carefully adding water to the reservoir‚ then insert the filter with your chosen coffee grounds. Initiate the process and savor!
Step 1: Adding Water to the Reservoir
Begin the brewing process by carefully filling the water reservoir with fresh‚ filtered water. Refer to your coffee maker’s markings to determine the appropriate water level based on the number of cups you intend to brew.
Precise measurement is key to achieving the desired coffee strength and flavor. Avoid overfilling‚ as this can lead to spills or an uneven brew.
Ensure the water is added slowly and steadily to prevent splashing. Using the correct water temperature – typically just off the boil – is also crucial for optimal extraction.
A quality brew starts with quality water‚ so prioritize filtered options for the best possible taste!
Step 2: Inserting the Filter and Coffee Grounds

Next‚ place your chosen filter – either a paper or permanent filter – securely into the filter basket. If using a paper filter‚ ensure it’s properly seated to prevent grounds from escaping during brewing.
Now‚ add your pre-ground coffee to the filter. The ideal coffee-to-water ratio is typically two tablespoons of ground coffee per six ounces of water‚ but adjust to your preference.
Gently level the coffee grounds for even saturation. A consistent grind size is also important for optimal extraction.
Remember‚ the quality of your coffee grounds significantly impacts the final flavor‚ so use freshly ground beans whenever possible!
Step 3: Initiating the Brewing Process
With the water reservoir filled and the filter containing coffee grounds in place‚ you’re ready to begin brewing! Carefully position the carafe on the warming plate or designated area beneath the filter basket.
Depending on your model‚ this might involve simply pressing a button or flipping a switch. Observe as the hot water begins to drip slowly over the coffee grounds‚ releasing their rich aroma.
Allow the brewing process to complete undisturbed. Resist the urge to interrupt it‚ as this can affect the flavor.
Once finished‚ your manual coffee maker will likely keep the coffee warm for a period‚ ready for you to enjoy!
Cleaning and Maintenance
Regular cleaning ensures optimal performance and longevity. Daily rinsing of components prevents residue buildup‚ while periodic descaling removes mineral deposits for consistently flavorful brews.
Proper care maintains your coffee maker’s efficiency and extends its lifespan‚ guaranteeing many enjoyable cups.
Daily Cleaning Procedures
Consistent daily cleaning is crucial for maintaining your manual coffee maker’s performance and ensuring the best possible coffee flavor. After each use‚ promptly discard the used coffee grounds and the filter – whether paper or permanent.
Rinse the filter basket thoroughly with warm‚ soapy water‚ removing any lingering residue. The carafe should also be washed with warm‚ soapy water and a non-abrasive sponge; avoid harsh chemicals that could affect the taste of your coffee.
Ensure all parts are completely dry before reassembling. Wipe down the exterior of the coffee maker with a damp cloth. This simple routine prevents buildup and keeps your coffee maker functioning optimally‚ delivering a consistently delicious brew every time.
Descaling Your Coffee Maker
Over time‚ mineral deposits from water can accumulate inside your manual coffee maker‚ affecting its performance and coffee quality. Descaling removes these deposits‚ restoring optimal brewing efficiency. A solution of equal parts white vinegar and water is commonly used.
Pour the solution into the water reservoir and run a full brewing cycle without coffee grounds. Follow this with two to three cycles of fresh water to thoroughly rinse away any remaining vinegar taste and residue.
Descaling frequency depends on water hardness; monthly is recommended for hard water areas. Regular descaling extends the lifespan of your coffee maker and ensures consistently flavorful coffee.
Troubleshooting Common Issues
If your manual coffee maker isn’t brewing‚ first check the power source and ensure it’s properly connected. A clogged filter basket or water reservoir can also hinder brewing; clear any obstructions.
Weak coffee often results from insufficient coffee grounds or a coarse grind. Adjust the coffee-to-water ratio and grind size for a bolder flavor. Bitter coffee may indicate over-extraction – reduce brew time or use a coarser grind.
Leaks can stem from a poorly seated carafe or damaged components. Inspect seals and connections. If issues persist‚ consult the manufacturer’s guide or seek professional repair.
Advanced Brewing Techniques
Explore pour-over methods for enhanced flavor control‚ adjusting brew time to unlock nuanced tastes. Experimentation is key to perfecting your manual coffee experience!
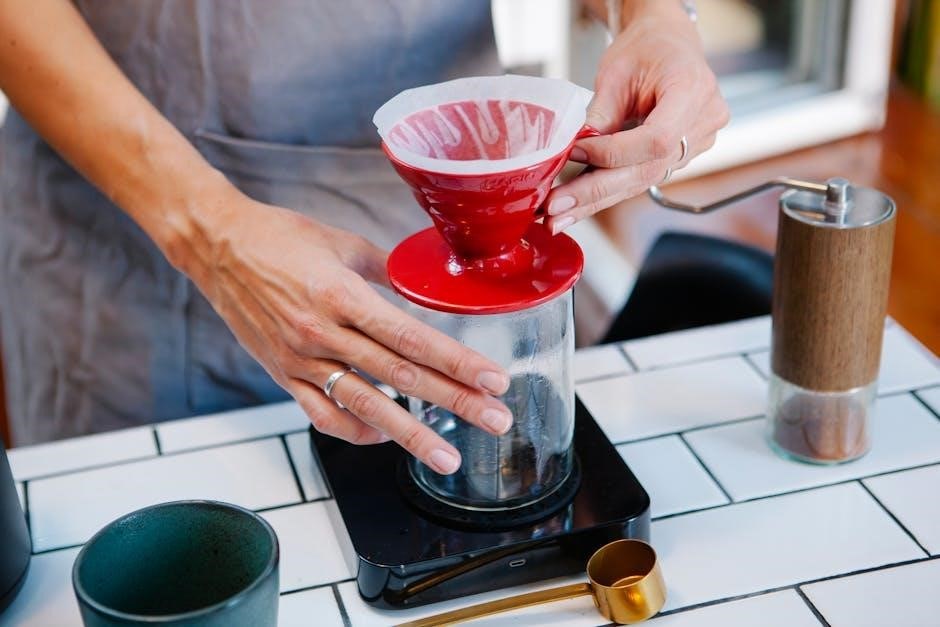
Pour-Over Method with Manual Coffee Makers
The pour-over technique elevates manual brewing‚ demanding a slower‚ more deliberate approach. Begin by pre-wetting the filter to eliminate paper taste and warm the carafe.
Slowly pour hot water (around 200°F) over the grounds in a circular motion‚ ensuring even saturation – this “bloom” releases trapped CO2.
Maintain a consistent‚ gentle pour‚ avoiding rushing‚ and allowing the water to drip through naturally. This method highlights the coffee’s delicate aromas and flavors‚ offering a cleaner‚ brighter cup.
Experiment with pour speed and patterns to fine-tune extraction and discover your ideal brew. Mastering pour-over unlocks a world of coffee possibilities!
Adjusting Brew Time for Flavor Control
Brew time significantly impacts coffee flavor; shorter times yield brighter‚ more acidic brews‚ while longer times produce bolder‚ potentially bitter results.
Finer grinds require shorter brew times‚ as they offer greater surface area for extraction. Conversely‚ coarser grinds need longer to fully develop their flavors.
Experimenting with these variables is key to personalization. If your coffee tastes sour‚ extend the brew time slightly. If it’s bitter‚ shorten it.
Small adjustments can dramatically alter the final cup‚ allowing you to tailor each brew to your precise preferences and unlock the coffee’s full potential.
Safety Precautions
Always prioritize safety when using your manual coffee maker. Avoid microwave or dishwasher use for jugs‚ and exercise caution with hot surfaces.
Ensure electrical safety by keeping cords dry and undamaged‚ preventing potential hazards during operation.
Electrical Safety Guidelines
Prioritize electrical safety during coffee maker operation. Never immerse the coffee maker base or electrical components in water or any other liquid to prevent shock hazards.
Regularly inspect the power cord for damage – cracks‚ fraying‚ or exposed wires – and discontinue use if any are found. Avoid using extension cords whenever possible; if necessary‚ ensure it’s appropriately rated for the appliance’s wattage.
Always unplug the coffee maker from the outlet when not in use‚ before cleaning‚ and during maintenance. Do not operate the appliance with a damaged cord or plug‚ or if it malfunctions. Seek professional repair for any electrical issues.
Ensure the outlet is properly grounded and avoid overloading the circuit. Keep the coffee maker away from flammable materials and moisture sources.
Handling Hot Surfaces
Exercise extreme caution when handling hot surfaces on your manual coffee maker. The carafe‚ warming plate‚ and certain exterior components reach high temperatures during and immediately after brewing.
Always use oven mitts or pot holders when handling the hot carafe or any parts that may be hot to avoid burns. Avoid touching these surfaces directly. Allow the coffee maker to cool completely before cleaning or storing.
Keep children and pets away from the coffee maker during operation and cooling. Be mindful of steam escaping during brewing‚ as it can cause scalding. Never place hands or objects near steam vents.
Handle the carafe with care to prevent spills and burns. A stable‚ heat-resistant surface is essential for safe operation.
Coffee Maker Models Comparison
AGARO Regency excels in precision and aesthetics‚ while KRUPS models prioritize a quick‚ satisfying start to your day with convenient brewing options.
Both brands offer diverse features‚ catering to varied preferences and brewing needs for the perfect cup.
Agaro Regency: Features and Benefits

The AGARO Regency coffee maker distinguishes itself through a commitment to both precision and elegant design‚ making it a standout choice for discerning coffee lovers. This model offers a customizable brewing experience‚ allowing users to fine-tune their coffee preparation to achieve optimal flavor profiles.
Its construction utilizes quality materials‚ ensuring durability and a sophisticated aesthetic that complements any kitchen décor. The Regency isn’t just about looks; it’s engineered for consistent performance‚ delivering a flavorful and aromatic cup every time.
Users appreciate its ease of use and the ability to control the brewing process‚ resulting in a truly personalized coffee experience. It’s a blend of style and substance‚ ideal for those who value quality and aesthetics;
Krups Coffee Maker: Overview
The KRUPS coffee maker is designed to seamlessly integrate into your daily routine‚ providing a reliable and convenient way to enjoy a hot‚ satisfying cup of coffee. Often functioning as part of a broader coffee system‚ KRUPS models prioritize ease of use and consistent brewing performance.
These coffee makers are known for their durability and practical features‚ offering a straightforward brewing process without compromising on flavor. They are built to kick-start your day‚ delivering a consistently enjoyable coffee experience.
Remember to never place the jug or insulated pot in a microwave‚ dishwasher‚ or on a hotplate to ensure longevity and safe operation. KRUPS offers a range of options to suit various preferences.
Enjoying Your Perfect Cup
Ultimately‚ mastering a manual coffee maker unlocks a world of flavor and control‚ allowing you to tailor each brew to your exact preferences. From selecting the right grind to adjusting brew time‚ the possibilities are endless.
Embrace the process and experiment with different techniques – pour-over methods‚ varying coffee-to-water ratios – to discover your signature cup. The journey itself is as rewarding as the destination.
Whether you prioritize precision‚ convenience‚ or simply the ritual of brewing‚ a manual coffee maker empowers you to consistently enjoy a truly exceptional coffee experience. Savor every sip!